

Store-bought lunch meats may be convenient, but they often come with unwanted preservatives, excess sodium, and artificial additives. Why not make your own? This homemade chicken lunch meat recipe is not only simple and delicious but also healthier and free from preservatives.
With just a few basic ingredients and an easy cooking method, you can create tender, flavorful, deli-style chicken slices perfect for sandwiches, wraps, salads, or meal prep. Say goodbye to store-bought processed meats and hello to a fresh, wholesome alternative!
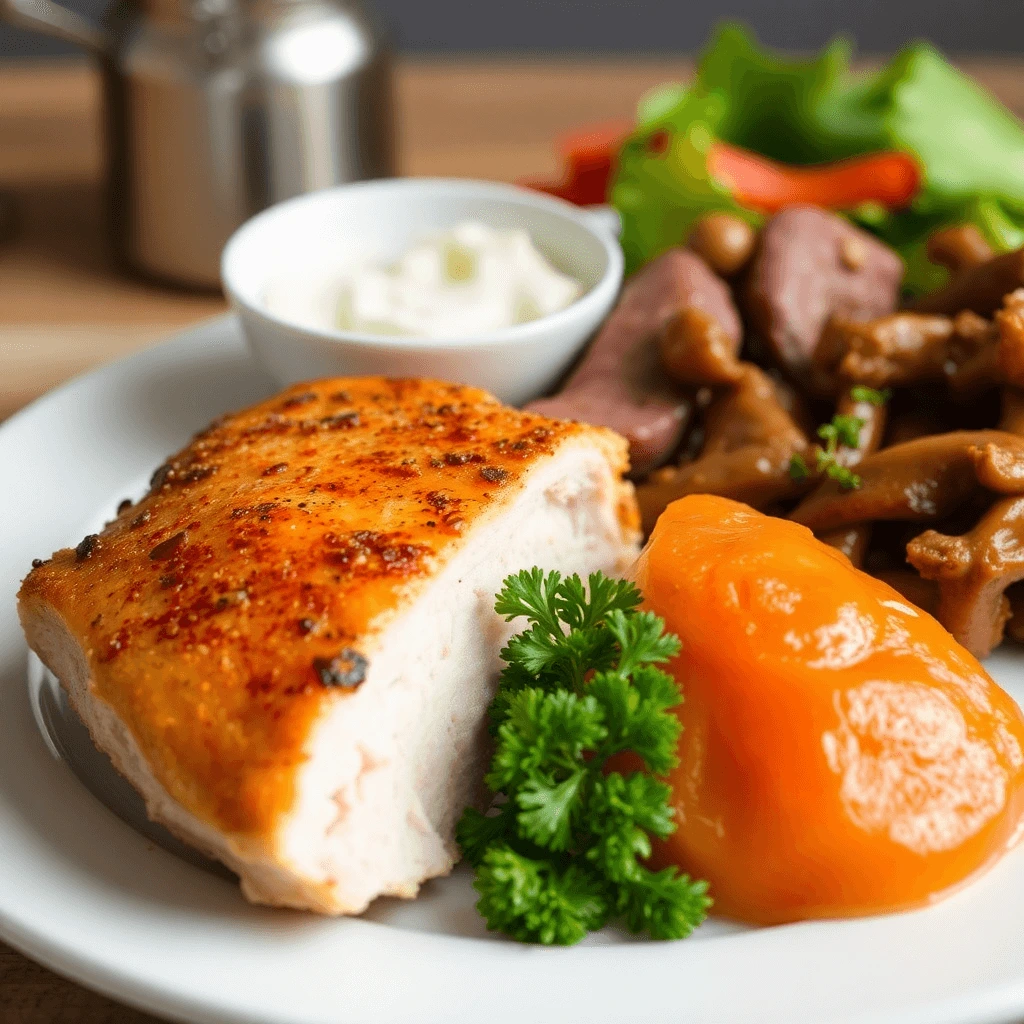
Ready to make your own homemade chicken lunch meat? Let’s get started!

Why Make Homemade Chicken Lunch Meat?
USDA Guidelines on Storing Cooked Meat
Link: USDA Food Safety and Inspection Service
Purpose: Provides official guidelines on meat storage and food safety.
1. Healthier Ingredients:
One of the main advantages of making your own chicken lunch meat is the control you have over the ingredients. Store-bought deli meats often contain preservatives, artificial flavors, and high sodium levels. By making it at home, you can use fresh, high-quality chicken, and choose seasonings and marinades that suit your dietary preferences, ensuring a healthier option.
2. Customizable Flavors:
Homemade chicken lunch meat allows you to tailor the flavors to your liking. You can experiment with different herbs and spices—like garlic, rosemary, or smoked paprika—to create unique flavor profiles. Whether you prefer a simple herbaceous taste or a bold, spicy kick, the possibilities are endless.
3. Cost-Effective:
Buying deli meats can add up quickly, especially if you purchase premium or organic options. Making chicken lunch meat at home can be more economical, allowing you to enjoy high-quality meat at a fraction of the cost. Plus, you can prepare larger batches and store them for later use, saving you money in the long run.
4. Reduced Waste:
Preparing your own chicken lunch meat minimizes packaging waste associated with store-bought products. You can use your own containers and eliminate excess plastic and cardboard. This eco-friendly approach is better for the environment and aligns with a sustainable lifestyle.
5. Easy Meal Prep:
Homemade chicken lunch meat is an excellent addition to meal prep. Sliced chicken can be used in various dishes, from sandwiches and wraps to salads and grain bowls. Having it ready to go can save time during busy weekdays and help you maintain a balanced diet.
6. Family-Friendly:
Making chicken lunch meat at home can be a fun family activity. Involving kids in the cooking process can encourage them to try new foods and learn about healthy eating. Plus, knowing exactly what goes into their food can help instill healthy habits from a young age.
7. Freshness Guaranteed:
When you make chicken lunch meat at home, you can enjoy it at its freshest. Unlike store-bought options that may sit on the shelf for days or weeks, your homemade chicken will taste deliciously fresh and tender. There’s nothing quite like the flavor of freshly cooked and sliced meat.
8. Food Safety:
Preparing chicken lunch meat at home allows you to follow safe food-handling practices, reducing the risk of foodborne illness associated with improperly processed meats. You can ensure that your chicken is cooked to the right temperature and handled safely throughout the cooking process.
Ingredients Needed for the Best Chicken Lunch Meat
Creating the best chicken lunch meat starts with selecting high-quality ingredients. Here’s a detailed look at each ingredient you’ll need:
1. Boneless, Skinless Chicken Breasts:
- Description: The star of the dish, fresh boneless, skinless chicken breasts are lean and versatile. Choosing high-quality chicken is essential because it affects the flavor and texture of your finished product.
- Tips: Opt for organic or free-range chicken if possible to ensure the best flavor and nutritional profile. Fresh chicken will give you a moist and tender lunch meat.
2. Olive Oil:
- Role: Olive oil adds moisture and helps create a flavorful crust while baking, preventing the chicken from drying out.
- Benefits: Besides enhancing flavor, olive oil is rich in healthy monounsaturated fats and antioxidants, making it a heart-healthy choice for your recipe.
3. Dijon Mustard:
- Role: Dijon mustard serves as a flavorful marinade base, adding depth and a subtle tanginess to the chicken. It also helps to tenderize the meat.
- Variations: You can experiment with whole-grain mustard for a coarser texture or spicy mustard for an extra kick.
4. Garlic Powder:
- Role: Garlic powder brings a robust flavor to the chicken, ensuring every slice is packed with savory goodness.
- Benefits: Garlic is known for its health benefits, including boosting the immune system and providing anti-inflammatory properties.
5. Onion Powder:
- Role: Similar to garlic powder, onion powder adds a deep, sweet flavor that complements the chicken beautifully.
- Tips: Use this as a time-saving alternative to fresh onions, which can impart a stronger, more potent taste.
6. Smoked Paprika:
- Role: Smoked paprika adds a rich, smoky flavor that enhances the overall taste of the chicken, giving it a deli-style profile.
- Variations: If you prefer a milder flavor, you can substitute with sweet paprika or regular paprika.
7. Salt and Pepper:
- Role: Salt enhances all the flavors in the dish, while pepper adds a hint of warmth and spice.
- Tips: Use sea salt or kosher salt for a cleaner taste, and freshly cracked black pepper for optimal flavor.
8. Fresh Herbs (Optional):
- Role: Fresh herbs like thyme, rosemary, or parsley can elevate the flavor of your chicken lunch meat by adding a fresh and aromatic quality.
- Tips: Use herbs that you enjoy or have on hand. You can chop them finely and mix them into the marinade or sprinkle them on top before baking.
9. Cooking Spray or Parchment Paper (For Baking):
- Role: While not a direct ingredient in the chicken, using cooking spray or parchment paper will prevent the meat from sticking to the pan, making cleanup easier.
- Variety: If you want to keep it healthier, choose an olive oil spray or unbleached parchment paper as your baking aid.
Optional Add-Ins:
- Lemon Juice or Zest:
- Adding some acidity enhances the flavors and keeps the chicken moist during the cooking process.
- Honey or Maple Syrup:
- A touch of sweetness can balance out the flavors, especially if you’re working with mustard and smoked paprika.
Final Thoughts:
Investing in high-quality ingredients not only improves the flavor but also ensures your homemade chicken lunch meat is nutritious and satisfying. Feel free to experiment with these ingredients to customize the flavor profile to your liking, creating a versatile lunch meat that you and your family will love.
Step-by-Step Guide to Making Chicken Lunch Meat
Making homemade chicken lunch meat is a straightforward process that can yield delicious, healthy results. Follow these steps for perfectly cooked and seasoned chicken lunch meat:
Step 1: Gather Your Ingredients
- Ingredients Needed: Boneless, skinless chicken breasts, olive oil, Dijon mustard, garlic powder, onion powder, smoked paprika, salt, pepper, and optional fresh herbs or add-ins.
- Tools Required:
- Baking sheet or roasting pan
- Parchment paper (optional)
- Mixing bowl
- Meat thermometer
- Sharp knife or electric slicer for slicing
- Food storage containers for storage
Step 2: Preheat the Oven
- Temperature Setting: Preheat your oven to 375°F (190°C). This ensures that the oven is ready and at the correct temperature before you cook the chicken, promoting even cooking and browning.
Step 3: Prepare the Chicken
- Trimming: If necessary, trim any excess fat or connective tissue from the chicken breasts for better texture and to avoid greasiness.
- Flatten the Chicken (Optional): For more uniform cooking, you can place each chicken breast between two pieces of plastic wrap and gently pound it to an even thickness using a meat mallet or rolling pin. This step helps the chicken cook evenly and can result in a more tender final product.
Step 4: Create the Marinade
- Mixing Ingredients: In a mixing bowl, combine olive oil, Dijon mustard, garlic powder, onion powder, smoked paprika, salt, pepper, and any optional herbs or add-ins you desire.
- Blending: Whisk the ingredients together until thoroughly blended, ensuring that the spices are evenly distributed.
Step 5: Marinate the Chicken
- Coating the Chicken: Place the chicken breasts in the bowl with the marinade, ensuring that each piece is well-coated. Alternatively, you can transfer the marinade and chicken breasts into a resealable plastic bag for even coating and easier cleanup.
- Marination Time: Allow the chicken to marinate for at least 30 minutes at room temperature or in the refrigerator for up to 4 hours for deeper flavor absorption. If refrigerating, bring the chicken back to room temperature before cooking to ensure even cooking.
Step 6: Bake the Chicken
- Preparation: Line the baking sheet or roasting pan with parchment paper for easy cleanup. Arrange the marinated chicken breasts in a single layer on the pan.
- Baking: Place the pan in the preheated oven and bake for about 25-30 minutes, or until the chicken reaches an internal temperature of 165°F (74°C). Use a meat thermometer to check doneness in the thickest part of the chicken.
Step 7: Rest the Chicken
- Cooling: Once cooked, remove the chicken from the oven and let it rest for about 5-10 minutes. This allows the juices to redistribute within the meat, ensuring a moist final product.
Step 8: Slice the Chicken
- Slicing Technique: After resting, use a sharp knife or electric slicer to slice the chicken into thin, even pieces. Cutting against the grain will yield more tender slices, enhancing the overall texture of the lunch meat.
- Thickness Preference: Adjust the thickness of the slices according to your preference. Thinner slices are great for sandwiches, while thicker slices work well for salads or snacks.
Step 9: Store the Chicken Lunch Meat
- Storage Options: Transfer the sliced chicken lunch meat into airtight containers. If you made a large batch, consider portioning it out for easy use throughout the week.
- Refrigeration: Store in the refrigerator for up to 4-5 days. If you want to keep it longer, you can freeze the slices in airtight bags for up to 2 months.
Step 10: Enjoy Your Homemade Chicken Lunch Meat
- Serving Suggestions: Use your homemade chicken lunch meat in sandwiches, wraps, salads, or as a protein source in grain bowls. The versatility of chicken lunch meat makes it a perfect addition to many meals!
By following this step-by-step guide, you can make delicious homemade chicken lunch meat that is healthier and tastier than store-bought options. Enjoy the satisfaction of creating a delicious, nutritious product tailored to your preferences!
How to Store and Use Homemade Chicken Lunch Meat
Storing your homemade chicken lunch meat properly is essential for maintaining its freshness and flavor. Follow these guidelines to ensure your chicken lunch meat stays delicious and safe to eat.
1. Proper Storage Methods
Airtight Containers:
- Usage: Place the sliced chicken lunch meat in an airtight container to minimize exposure to air, which can lead to spoilage and drying out.
- Materials: Use glass or plastic containers with tight-sealing lids. Glass containers are especially good for reheating.
Freezer Storage:
- Technique: If you’ve prepared a large batch, consider freezing individual portions. Place slices between layers of parchment paper or wax paper to prevent them from sticking to each other.
- Containers: Store in freezer-safe zipper bags or vacuum-sealed containers. Remove as much air as possible to prevent freezer burn.
- Shelf Life: Homemade chicken lunch meat can be frozen for up to 2 months. After two months, it may still be safe to eat but could lose flavor and texture.
2. Shelf Life
Refrigeration:
- Duration: When stored properly in the refrigerator, homemade chicken lunch meat typically stays fresh for 4-5 days.
- Signs of Spoilage: Always check for signs of spoilage before consuming, such as an off smell, discoloration, or a slimy texture. If any of these occur, it’s best to discard the meat.
Thawing:
- Method: Thaw frozen chicken lunch meat in the refrigerator overnight for safe and slow defrosting. You can also use the defrost setting on your microwave if you need it quickly, but be sure to cook it immediately after thawing.
3. Best Practices for Maintaining Freshness
- Avoid Contamination: Always use clean utensils when handling the chicken lunch meat to prevent cross-contamination.
- Temperature Control: Keep the chicken lunch meat stored at a consistent refrigerator temperature (below 40°F/4°C) and make sure your freezer is at 0°F (-18°C).
- Labeling: If you’re freezing portions, label each container or bag with the date and contents. This will help you keep track of how long it has been stored.
4. How to Use Homemade Chicken Lunch Meat
Sandwiches and Wraps:
- Classic Use: Use the lunch meat in sandwiches or wraps, adding your favorite condiments, lettuce, tomatoes, and other vegetables for a nutritious meal.
- Variety: Experiment with different types of bread, such as whole grain, sourdough, or even wraps made from lettuce or tortillas.
Salads:
- Protein Boost: Add homemade chicken lunch meat to salads for added protein. Dice the chicken and toss it into green salads or grain bowls with vegetables and a tasty dressing.
- Meal Prep: Prepare a batch of salad ingredients in advance, and add the chicken lunch meat when you’re ready to eat.
Snacks:
- On-the-Go: Slice the chicken lunch meat into bite-sized pieces for a healthy snack. Pair it with cheese, whole grain crackers, or fresh fruit for a balanced option.
- Charcuterie Boards: Incorporate slices of chicken lunch meat into a charcuterie or cheese board for entertaining. Complement with nuts, olives, and various dips.
Casseroles and Pasta Dishes:
- Cooking Use: Incorporate the chicken lunch meat into casseroles, pasta dishes, or stir-fries. It adds flavor and protein without much prep work.
- Simple Dishes: Fold the lunch meat into a creamy pasta dish or use it as a topping for baked casseroles for additional savory richness.
Breakfast Options:
- Breakfast Wraps: Include slices of chicken lunch meat in breakfast wraps with scrambled eggs and cheese for a filling breakfast option.
- Omelettes: Add chopped chicken lunch meat to omelets or frittatas for a protein-packed breakfast.
5. Creative Recipes
- Chicken Lunch Meat Quesadillas: Layer chicken lunch meat, cheese, and other fillings between tortillas, and grill until the cheese melts. Serve with salsa or guacamole.
- Chicken Salad: Combine diced chicken lunch meat with Greek yogurt or mayonnaise, diced celery, grapes, and walnuts for a creamy chicken salad.
- Stir-Fried Rice: Toss slices of chicken lunch meat into fried rice or vegetable stir-fry for a quick meal.
Final Thoughts
Homemade chicken lunch meat is not only a versatile ingredient but also a great way to eat healthier and avoid preservatives found in store-bought alternatives. With proper storage techniques and creative usage ideas, you can make the most of your homemade chicken lunch meat while keeping it fresh and delicious for days to come. Enjoy the benefits of knowing exactly what’s in your food while savoring the great taste you’ve created!
Frequently Asked Questions (FAQs)
1. How long can I store homemade chicken lunch meat in the refrigerator?
- Answer: Homemade chicken lunch meat can be stored in the refrigerator for about 4 to 5 days. Always ensure it is kept in an airtight container to maintain freshness and protect it from other strong-smelling foods.
2. Can I freeze chicken lunch meat? If so, how should I do it?
- Answer: Yes, you can freeze chicken lunch meat! To do so, slice the chicken and layer the slices between sheets of parchment paper or wax paper to prevent them from sticking together. Then, place the layered slices in an airtight freezer-safe bag or container and remove as much air as possible. Frozen chicken lunch meat can last for up to 2 months.
3. How can I tell if my homemade chicken lunch meat has gone bad?
- Answer: Signs of spoilage include an off or sour smell, discoloration, a slimy texture, or any unusual growths. If you observe any of these signs, it is best to err on the side of caution and discard the chicken lunch meat.
4. Can I make chicken lunch meat with cooked chicken leftovers?
- Answer: Absolutely! You can use cooked leftover chicken to make lunch meat. Shred or slice the cooked chicken finely and mix it with your preferred seasonings or marinades before storing it the same way as you would with freshly cooked chicken lunch meat.
5. What are some ways to season my chicken lunch meat?
- Answer: There are endless seasoning possibilities for chicken lunch meat! Common options include salt, pepper, garlic powder, smoked paprika, herbs like rosemary or thyme, and marinades such as barbecue sauce or teriyaki. Adjust the ingredients according to your taste preferences.
6. Can I add other ingredients to my homemade chicken lunch meat?
- Answer: Yes! Feel free to add ingredients like chopped herbs, diced vegetables (such as bell peppers or onions), or spices to enhance the flavor and nutritional value of your chicken lunch meat. Just ensure that any additional ingredients are finely chopped to maintain a good texture.
7. Is it safe to eat homemade chicken lunch meat cold?
- Answer: Yes, homemade chicken lunch meat is typically safe to eat cold, especially if it has been cooked to an internal temperature of 165°F (74°C) and stored properly. However, always ensure that it is stored at safe temperatures to prevent bacterial growth.
8. How can I use homemade chicken lunch meat in my meals?
- Answer: There are many uses for chicken lunch meat! It can be included in sandwiches, wraps, salads, quesadillas, breakfast dishes, pasta, and casseroles. Get creative by incorporating it into various meal types for added protein.
9. Can I make chicken lunch meat in bulk?
- Answer: Yes, batch cooking chicken lunch meat is a great idea! You can prepare large quantities and store them in the refrigerator or freezer for meal prep. Just ensure proper portioning and storage to maintain freshness.
10. Can I make chicken lunch meat without an oven?
- Answer: Yes! If you prefer not to use an oven, you can also prepare chicken lunch meat on a stovetop with a skillet or grill. Cook the chicken over medium heat until it reaches the appropriate temperature, ensuring that it is cooked evenly.
11. Is homemade chicken lunch meat healthier than store-bought?
- Answer: Generally, yes! Homemade chicken lunch meat allows you to control the ingredients, reduce sodium, and avoid preservatives and artificial additives commonly found in many processed deli meats. This can make it a healthier option overall.
12. What should I do if the chicken lunch meat is tough or dry?
Answer: If your chicken lunch meat turns out tough, it may have been overcooked. To prevent this next time, use a meat thermometer to monitor the internal temperature during cooking closely, ensuring it reaches 165°F (74°C) without cooking longer than necessary. If you find the lunch meat dry, you can try adding sauces or dressings when using it in meals to enhance moisture and flavor.