

Who doesn’t love a fun and delicious smash cake? Whether you’re celebrating a birthday, baby’s first milestone, or any special occasion, chocolate smash cake designs add a touch of creativity and excitement to your dessert table. These cakes are not only visually stunning but also a joy to break open, revealing hidden treats inside!
In this guide, we’ll explore cute, creative, and easy-to-make chocolate smash cake designs that are perfect for any celebration. From simple DIY ideas to unique themed decorations, you’ll find inspiration to craft the ultimate smash cake that looks as good as it tastes. Let’s dive in!
What Is a Chocolate Smash Cake?
- Baking Techniques:
A chocolate smash cake is a delightful twist on the traditional birthday cake, designed to be both a feast for the eyes and an interactive experience. This whimsical dessert is typically made from layers of rich, moist chocolate cake, filled with creamy chocolate frosting or unique fillings that can surprise and delight guests when the cake is smashed.
Key Features of a Chocolate Smash Cake:
- Composition:
- At its core, a chocolate smash cake consists of several layers of decadent chocolate cake. The cake is usually baked to ensure a light, airy texture while being rich in flavor. The layering is often complemented by sumptuous chocolate ganache or buttery frosting that creates a smooth, indulgent layer.
- Decorations:
- The exterior of a chocolate smash cake is often beautifully decorated with vibrant, colorful elements like sprinkles, edible glitter, or themed toppers that match a party’s celebration. This decorative appeal adds to the joyous atmosphere and transforms the cake into a centerpiece for the occasion.
- The Smash Experience:
- What sets the chocolate smash cake apart from regular cakes is its interactive element. The cake is usually designed to be smashed, either by hands, a small mallet, or even by the birthday honoree. When the cake is broken open, it often reveals gooey fillings such as chocolate sauce, colorful candies, or confetti sprinkles. This ‘surprise’ element creates an exciting and memorable experience for guests, especially for children.
- A Perfect Choice for Celebrations:
- Chocolate smash cakes are ideal for birthdays, baby showers, or any festive gathering where fun and creativity are emphasized. They cater not just to chocolate lovers but also to those who appreciate a unique dessert experience that engages everyone present.
- Versatility and Customization:
- One of the beauty of chocolate smash cakes is their versatility. They can be tailored to fit any theme or dietary requirement, including gluten-free or vegan options. Customizations can range from the flavor of the fillings to the style of decorations, making each cake a unique masterpiece that reflects the personality of the celebrant.
Overall, a chocolate smash cake is more than just dessert; it’s an innovative way to celebrate, turning a typical birthday cake into an exciting interactive activity that creates lasting memories for everyone involved. It’s the perfect blend of flavor, fun, and festivity that makes any occasion even more special!
Essential Ingredients and Tools for Making a Chocolate Smash Cake
Creating a chocolate smash cake involves careful selection of ingredients and having the right tools. Here’s a breakdown:
Ingredients
- Chocolate Cake Ingredients:
- All-Purpose Flour: The base of your cake; it provides structure.
- Cocoa Powder: Unsweetened cocoa powder adds the rich chocolate flavor that defines your cake.
- Granulated Sugar: Sweetens the cake and helps maintain moisture.
- Baking Powder & Baking Soda: These leavening agents are essential for a light and fluffy texture.
- Salt: Enhances the flavor of the cake.
- Eggs: Provide structure and moisture; you can use whole eggs for richness or egg whites for a lighter texture.
- Milk: Adds moisture; you can also use buttermilk for a richer flavor and tenderness.
- Vegetable Oil: Keeps the cake moist; alternatives include melted butter or other oils.
- Vanilla Extract: A flavor enhancer that complements the chocolate.
- Frosting and Filling:
- Butter: Room temperature unsalted butter is essential for making a creamy frosting.
- Powdered Sugar: Sweetens the frosting and gives it a smooth texture.
- Cocoa Powder: For chocolate frosting; add to the butter and sugar mixture.
- Heavy Cream or Milk: Used to achieve the desired consistency of the frosting.
- Fillings: Consider options like chocolate ganache, whipped cream, or even candy pieces for the surprise inside the cake.
- Decoration:
- Sprinkles or Edible Glitter: To give your cake a festive look.
- Chocolate Chips or Chunks: Perfect for adding texture and visual appeal.
- Toppers: These can range from themed cake toppers to fresh flowers or fruit that align with the celebration.
- For the Smash Element:
- Candy or Treats: Small treats like M&Ms, gummy candies, or even a chocolate sauce to fill the center cavity of the cake. This adds the element of surprise when the cake is smashed open.
Tools
- Baking Equipment:
- Mixing Bowls: Various sizes for mixing batter and frosting.
- Electric Mixer: A stand mixer or hand mixer is helpful for achieving a smooth batter and frosting.
- Measuring Cups and Spoons: Essential for accurate ingredient measurements.
- Spatulas: For folding ingredients and spreading frosting.
- Cake Baking and Assembly:
- Cake Pans: Two or three round cake pans (typically 8 to 9 inches) for layering. Make sure to grease and line them to prevent sticking.
- Cooling Rack: Allows cakes to cool completely before frosting, preventing melting of the frosting.
- Paring Knife or Cake Leveler: To trim any domes off the cakes for even stacking.
- Turntable: Useful for evenly frosting the cake and adding decorative details.
- Smash Tools:
- Small Mallet or Hammer (Optional): For smashing the cake; consider using something safe and manageable for kids if they are participating.
- Plastic Wrap or Parchment Paper: To contain the mess when smashing the cake, especially if you’re doing this outdoors or in a controlled environment.
- Decorating Tools:
- Piping Bags and Tips: For creating decorative borders or writing on the cake.
- Offset Spatula: For spreading frosting smoothly over the cake.
- Squeeze Bottles: For drizzling chocolate or any other sauces over the cake for a decorative touch.
By gathering these essential ingredients and tools, you’ll be well-equipped to create a stunning and delicious chocolate smash cake that will impress your guests and create memorable moments during the celebration. Enjoy the baking process, and don’t forget to have fun smashing the cake!
Cute and Creative Chocolate Smash Cake Designs to Try
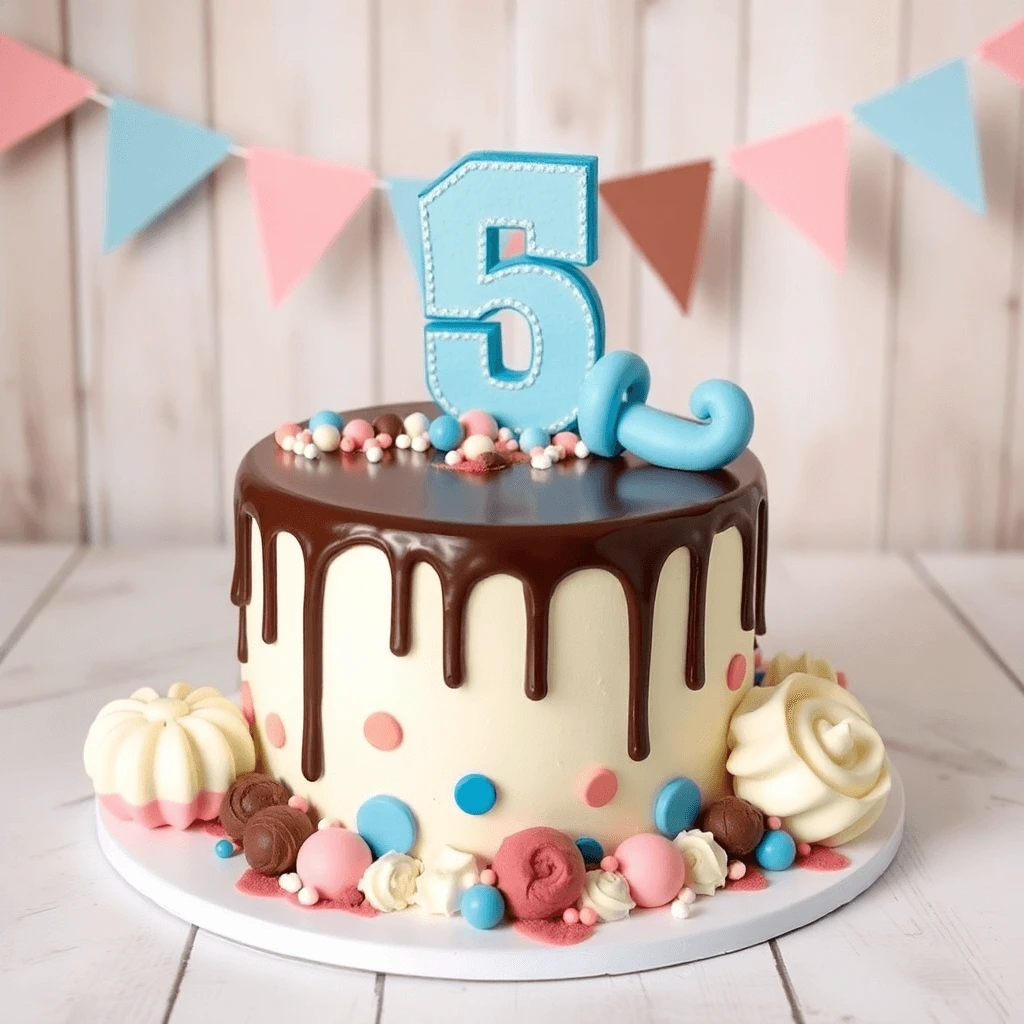
- Classic Chocolate Drip Cake:
- Design Elements: After frosting your chocolate cake, drizzle a glossy chocolate ganache over the edges, letting it drip down the sides. Top it off with whipped cream swirls and colorful sprinkles.
- Customization: Add themed cake toppers or fresh fruit like strawberries or cherries for a pop of color.
- Rainbow Surprise Cake:
- Design Elements: Use layers of colored buttercream beneath a chocolate exterior. When the cake is smashed, vibrant sprinkles or candies speckled throughout the layers will burst out.
- Customization: Implement different color themes based on the occasion—like pastel colors for baby showers or bright hues for birthdays.
- Animal-Inspired Smash Cake:
- Design Elements: Transform your cake into a cute animal face, like a bear or a penguin. Use chocolate frosting for the base and fondant or candy for ears, eyes, and other features.
- Customization: Tailor the animal design to reflect the birthday child’s favorite animal or the theme of the party.
- Under the Sea Smash Cake:
- Design Elements: Decorate with swirls of blue and green frosting to resemble waves. Add gummy fish, seashells, and seaweed made from fondant or chocolate.
- Customization: Consider smashing the cake in a “treasure chest” filled with candy sea creatures, providing an adventurous touch!
- Themed Sports Cake:
- Design Elements: Create a cake that represents a favorite sport, using green frosting for a soccer field or brown frosting for a football. Use edible markers, fondant, or chocolate molds to shape game elements like soccer balls or basketballs.
- Customization: Personalize it with the celebrant’s name, jersey number, or favorite team colors.
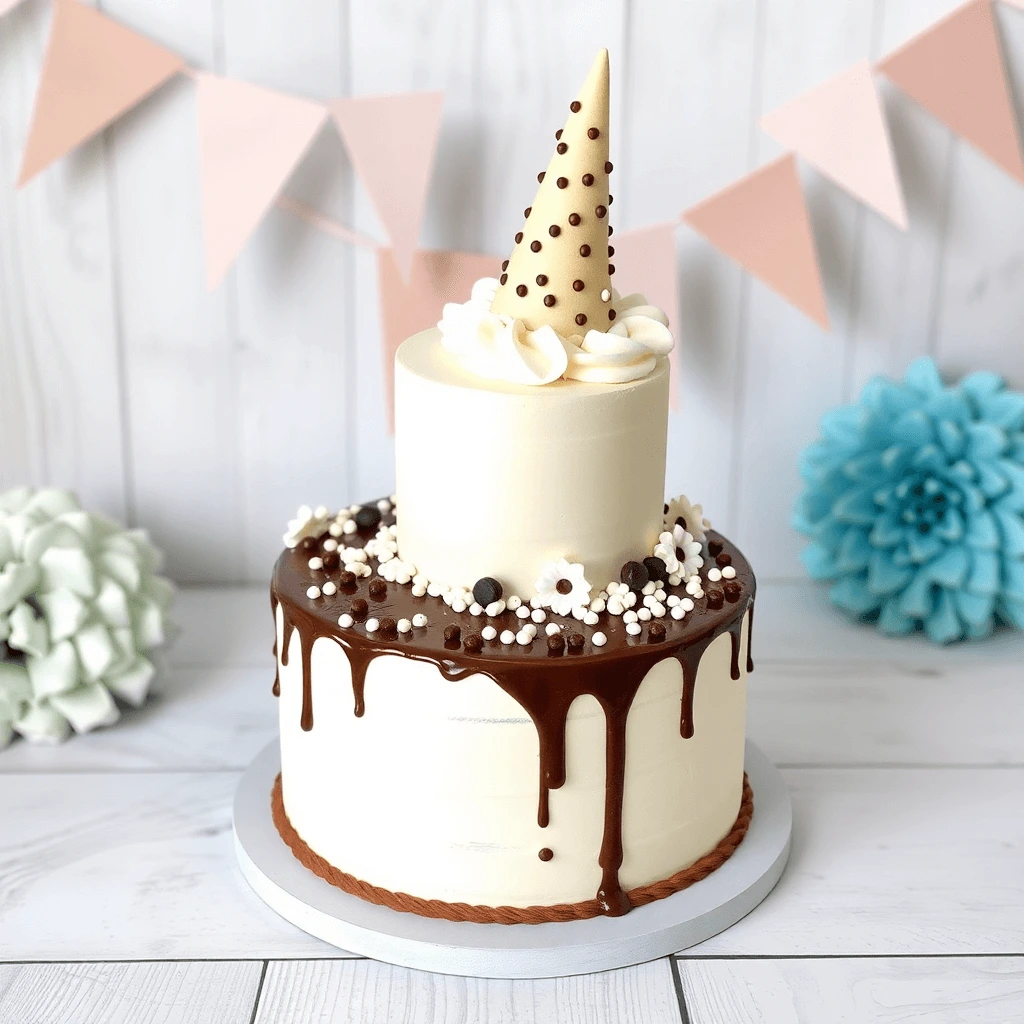
- Fairy Tale Castle Smash Cake:
- Design Elements: Build a chocolate cake that looks like a castle with turrets made from ice cream cones dipped in chocolate. Use frosting to create brick patterns and edible glitter for a magical touch.
- Customization: Incorporate decorations like candy knights or figurines and perhaps a surprise filled with edible glitter or sparkly candies for extra excitement.
- Garden Flower Cake:
- Design Elements: Frost the cake in soft pastel colors, creating a garden scene with flower-shaped cookies or fondant petals on top. Use green frosting for grass accents.
- Customization: Hide edible flowers or candy within, which can pour out when the cake is smashed, resembling a blossoming surprise.
- Chocolate Explosion Cake:
- Design Elements: Create a hollow cake that houses a mixture of candies, sprinkles, or delicious surprises inside. When smashed, these candies spill out, providing a fun, vibrant explosion of color and taste.
- Customization: Experiment with different candy types based on preferences. For example, use gummy candies, chocolates, or even toy figurines for themed occasions.
- Cactus-Themed Smash Cake:
- Design Elements: Decorate a chocolate cake to look like a cute cactus using green buttercream. Create spikes with star-shaped piping tips and place small flower candies on top.
- Customization: For additional fun, you can hide some candy succulents inside the cake that pop out upon smashing.
- Chocolate Layer Cake with Surprise Fillings:
- Design Elements: Use alternating layers of chocolate cake and colorful fillings, such as fruit preserves or frosting swirls. Decorate the outside with chocolate ganache and various toppings.
- Customization: Make the fillings themed—like party colors or flavors that match the event theme.
Tips for Designing Your Smash Cake:
- Color Coordination: Choose colors that coordinate with your event theme for a cohesive look.
- Textures: Combine different textures (smooth frosting with crunchy toppings or soft fillings) to enhance the overall tactile experience of the cake.
- Interactive Elements: Think about adding interactive elements, like edible glitter or popping candy, that create excitement for both kids and adults when the cake is smashed.
- Safety: Ensure that decorations are edible and safe for all ages, especially for young children, to avoid any choking hazards.
By implementing these cute and creative designs, you can turn a simple chocolate smash cake into a stunning centerpiece that will delight everyone at the celebration. Each design not only provides visual appeal but also enhances the fun of smashing and revealing the surprises hidden inside!
Step-by-Step Guide to Making Your Own Chocolate Smash Cake
Step 1: Gather Your Materials
Before you start baking, make sure you have all your ingredients and tools ready:
Ingredients:
- For the chocolate cake:
- All-purpose flour
- Unsweetened cocoa powder
- Granulated sugar
- Baking powder and baking soda
- Salt
- Eggs
- Milk (or buttermilk)
- Vegetable oil (or melted butter)
- Vanilla extract
- For the frosting:
- Unsalted butter
- Powdered sugar
- Heavy cream or milk
- Cocoa powder (for chocolate frosting)
- For the “smash” elements:
- Candies (like M&Ms, gummies, or chocolate chunks)
- Optional: chocolate sauce or caramel for extra flavor
Tools:
- Mixing bowls
- Electric mixer (stand or hand)
- Measuring cups and spoons
- Rubber spatula
- Baking pans (8 or 9 inches)
- Parchment paper
- Cooling rack
- Offset spatula for frosting
- Cake decorating tools (if desired)
Step 2: Bake the Chocolate Cake
- Preheat the Oven: Preheat your oven to 350°F (175°C). Grease your cake pans and line the bottoms with parchment paper to prevent sticking.
- Mix Dry Ingredients: In a large bowl, sift together the flour, cocoa powder, baking powder, baking soda, and salt until well combined.
- Mix Wet Ingredients: In another bowl, whisk together the eggs, milk, oil, and vanilla extract until smooth.
- Combine Mixtures: Gradually add the dry ingredients to the wet mixture, mixing until just combined. Be careful not to overmix.
- Pour Batter into Pans: Divide the batter evenly between the prepared pans and smooth the tops with a spatula.
- Bake the Cakes: Place the pans in the preheated oven and bake for 25-30 minutes, or until a toothpick inserted in the center comes out clean.
- Cool the Cakes: Remove the pans from the oven and let them cool in the pans for about 10 minutes. Then, transfer the cakes to a cooling rack to cool completely.
Step 3: Create the Smash Element
- Prepare the Center: Once the cakes have cooled, take one of the layers (the one you want to be the bottom layer) and carve out a small cavity in the center, about 1-2 inches deep and 4 inches wide, depending on how much filling you want.
- Fill the Cavity: Fill the cavity with your chosen candies (e.g., M&Ms, gummy bears, chocolate chips, etc.). You can also add some chocolate sauce or caramel to make it extra delicious.
Step 4: Frost and Assemble the Cake
- Make the Frosting: In a large bowl, beat the softened butter until creamy. Gradually add powdered sugar and cocoa powder, mixing until incorporated. Add milk or cream, one tablespoon at a time, until you reach your desired consistency.
- Assemble the Cake Layers: Place the first layer (filled one) on your serving plate. Spread a generous amount of frosting on top of the layer. Place the second layer on top, pressing down gently to ensure it adheres.
- Crumb Coat: Apply a thin layer of frosting all over the cake (this is called the crumb coat). It helps trap the crumbs and creates a smooth base for the final layer of frosting. Chill the cake in the fridge for about 30 minutes.
- Final Frosting Layer: After chilling, apply a generous layer of frosting all over the cake. You can use an offset spatula to create swirls or smooth it out entirely.
Step 5: Decorate the Cake
- Decorate Creatively: Use sprinkles, edible glitter, or chocolate chips to decorate the top and sides of the cake. You can also add decorative elements, such as mini chocolate bars or themed cake toppers.
- Drizzle (Optional): For a finished look, you can drizzle melted chocolate or caramel over the top of the cake.
Step 6: Prepare for the Smash
- Chill: To keep your cake stable, consider refrigerating it for at least 30 minutes before serving.
- Serving: When it’s time to celebrate, present the cake and prepare for the fun!
Step 7: Smash the Cake!
- Smashing the Cake: Use a mallet or a small hammer to gently smash the top of the cake to release the candies inside. You can also have children safely smash the cake for a fun activity!
Step 8: Serve and Enjoy!
- Slice and Serve: After the cake has been smashed, cut slices and serve to eagerly awaiting guests. Enjoy the surprised expressions when they discover the hidden treats!
Tips for Success
- Practice Makes Perfect: If you’re new to cake decorating, consider practicing your frosting technique using scrap pieces or smaller cakes.
- Make It Ahead: You can bake and freeze the cakes a day or two in advance to save time.
- Theme It Up: Customize the cake’s decorations or fillings based on the theme of the celebration for added personalization.
By following this step-by-step guide, you’ll create a delicious chocolate smash cake that not only tastes great but also adds an element of fun to your celebration! Enjoy the process and the reactions when it’s time to smash.
Tips and Tricks for the Perfect Smash Cake
1. Choose the Right Recipe
- Opt for Moist Cakes: Select a chocolate cake recipe that yields a moist and tender crumb. This will help the cake hold up when smashed and keep it enjoyable to eat. Consider using buttermilk or adding sour cream for added moisture.
- Experiment with Flavors: While chocolate is classic, don’t hesitate to add different extracts (like almond or coffee) or mix in spices (like cinnamon) to create a unique flavor profile that complements the chocolate.
2. Get the Proportions Right
- Layer Size: Keep in mind the size of the layers. A good height for smash cakes is around 4 to 6 inches tall. This provides enough height for a dramatic visual effect while ensuring the cake can be easily smashed.
- Fillings: Consider the amount of filling inside. Too much can cause structural instability, while too little may not provide the “wow” factor when the cake is smashed.
3. Master the Frosting
- Stability is Key: When making the frosting, ensure that it has the right consistency. A thicker frosting (like buttercream) will help hold its shape better and provide a sturdy base for both decoration and structure.
- Chill Your Frosting: If your frosting is becoming too warm while decorating, place it in the fridge for a few minutes to firm it up. This will help you achieve cleaner lines and a neater appearance.
4. Crumb Coating
- Use Crumb Coating: Applying a thin layer of frosting (aka crumb coat) helps trap any loose crumbs and creates a smooth surface for the final layer. Chill the cake after this step to set the crumb coat before applying the final frosting layer.
5. Assemble with Care
- Layer Integrity: When stacking the tiers of your smash cake, ensure that each layer is level. Use a serrated knife to trim any domed tops off each layer before stacking, creating an even surface.
- Use Dowels for Support: If you’re making a larger smash cake with multiple layers, consider using dowels to provide extra support and stability. Cut them to the same height as your cake layers and place them before adding the top layer.
6. Decorations
- Choose Edible Decorations: Use decorations that are safe and edible, particularly for children’s cakes. Avoid decorative elements that can cause choking hazards, such as whole candies, and opt for smaller options if needed.
- Incorporate Themes: Think about the overall theme of the celebration. Use themed decorations (like toys, colors, or designs) to personalize the cake. Edible images or themed cake toppers can also add a nice touch.
7. Timing the Smash
- Guide the Moment: Prepare for the smash by ensuring that you have a safe space for it. Have a designated area for smashing the cake, preferably on a table covered with a wipeable tablecloth.
- Capture the Moment: Have cameras or smartphones ready to capture the reactions as the cake is smashed. These moments create lasting memories and wonderful photos.
8. Serve Creatively
- Get Creative with Serveware: Consider using fun plates or themed serving dishes that match the occasion. Think about using clear cups for individual servings of smashed cake with candy or sprinkles.
- Keep It Fun and Clean: Have wet wipes or a damp cloth nearby to clean up any mess after the smash. If the cake is intended for a young child, consider placing an apron or bib to make clean-up easier.
9. Safety First
- Food Allergies: Always check with guests for allergies. If your smash cake contains common allergens (like nuts or gluten), consider making an alternative that is safe for those with dietary restrictions.
- Monitor Kids: If children are participating in the smashing or eating, keep a close eye on them to ensure safe handling of the cake, especially when dealing with items in the cake or large pieces.
10. Have Fun!
- Enjoy the Process: Making a smash cake is a fun and creative endeavor. Don’t stress too much about perfection; embrace any imperfections as part of the charm. Engage with the process and let your creativity shine!
By following these tips and tricks for the perfect smash cake, you’ll ensure a fun and memorable experience for both the cake creator and the participants. From the baking process to the big smash moment, each step contributes to a delightful and joyous celebration!